Walk this way: Stanwood landscaper makes paths beautiful
Published 10:36 pm Wednesday, January 23, 2008
Paths may spend their days getting walked all over, but you still need to give them some attention.
There are practical issues such as safety, wheelbarrow access and getting from the back door to the veggie beds.
Paths are an important aesthetic element in the landscape, too. Paths lead the eye through the landscape. They provide mystery and that moment of surprise when you turn a corner and spot something unexpected. They can add a sweep of color and texture to the garden.
When Scott Lankford designs a garden, paths are one of the first things he plans.
“I consider them critical,” said Lankford, a landscape architect with Designs Northwest, an architectural firm based in Stanwood.
Paths are essential to the way the garden functions and how the “rooms” fit together.
In most landscaping projects, the hardscape — fences, walls and walkways — are going to cost more than the plants, typically twice as much. When it comes to paths, the least expensive materials are gravel and bark. Gravel costs about $1 a square foot installed and bark about $1.50. In comparison, poured concrete costs about $5 a square foot and pavers cost about $15 installed. Stone costs $23 to $35 a square foot.
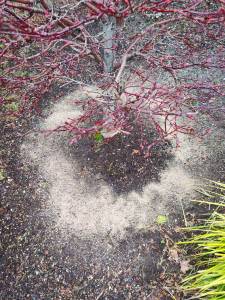
Lankford has been experimenting with using cast-in-place pads. He wanted to find an inexpensive material that would still give a more organic look than a preformed pad, which he said can look phony. Concrete is mixed in a wheelbarrow and poured into depressions in the ground. Then, the concrete is hand troweled to give it some texture. Leafs can be used as stamps or shells, glass and rocks can be embedded to create visual interest, he said. The result looks a bit like a large fieldstone buried in the ground. The cast-in-place pads cost about $3.50 a square foot installed — less if you do it yourself.
“Cast pads make you pause and appreciate what’s at your feet,” Lankford said.
Cast pads, gravel, bark and paver paths are all projects a capable homeowner can complete, he said.
When planning a path, the most important consideration is safety, he said. Pea gravel — really, any round gravel — is not a good choice for paths since walking on it is like trying to walk on marbles. Choose crushed gravel instead. Sometimes people want to use flagstone for the entry, but he said the material is too thin and won’t provide a stable enough base for heavy foot traffic when placed on sand.
Save the best, most expensive materials such as stone for the house’s entries, he said. If a client can’t afford an entire entry of expensive materials, Lankford said he’ll pair a small amount of the finer material with less expensive options. For instance, he might create a medallion of stone in the entryway and pair it with pavers, concrete or gravel.
It’s important to establish a hierarchy of paths. Lankford has seen homes where a path to the mudroom is wider than the one to the entryway, and visitors end up heading to the mudroom. As a general rule, the more important the path, the wider it should be, he said, “Just like the freeway.”
Use the stablest materials — concrete, stone and pavers — for high-traffic paths and those that come down off a deck or landing. For less-used paths choose bark, mulch or gravel. For a contemplative path designed to slow the visitor down, use individual stepping stones and the cast in place concrete pads. The more used the path, the more formal the material or more spectacular the plant. Think of the front door like the formal living room of your house: This is where you use the most refined texture and most interesting materials.
Look to the contours of the landscape and the house, Lankford said, to determine where paths will head. It’s mostly common sense. You’ll need a path from the parking area to the house, from the patio to the garden, from the front walk to the entry and from the garden to utility areas. He often uses paths to separate the planting bed from the lawn.
Paths need to be set down in the landscape rather than perched above it. Our natural instinct is to follow paths worn into the ground. Anything on top of the ground appears new and unused, he said. Visually, a path laid flat on the ground will stick out like a sore thumb. Getting that path lower may mean mounding the beds on either side or digging the path area three to four inches deep.
When choosing the plants that will flank a path, think about fragrance. Rosemary, daphne and lavender, for instance, give off a pleasant whiff when you brush by. Choose plants with contrasting foliage color or adding in something that gives a puff of color, such as an astilbe, nandina, burning bush or zonal geranium. It’s fun to have something bright at the end of the path, such as an early blooming rhododendron with hot pink blooms or a star magnolia.
Above all, Lankford said, the paths ought to please the homeowner.
“It’s not just for the neighbors,” he said. “It’s for you.”
Reporter Debra Smith: 425-339-3197 or dsmith@heraldnet.com
Cast-in place-pads
Landscape architect Scott Lankford suggests using cast-in-place pads, which require no wood forms, as an inexpensive path material resembling fieldstone.
Materials and tools: Upside down spray paint (the stuff used to mark underground utilities), a trowel, a hoe, a wheelbarrow, bagged ready-mix concrete
Instructions: First, lay out the path using the spray paint to make the design. Lankford suggests not starting right next to the door, since the first one probably won’t be the prettiest. If you really don’t like the result, it’s easy to break up in the first 24 hours.
Dig out the area to a depth of about 2 inches. Lankford makes each form about 2-by-3-feet wide. A 2-by-3 foot pad takes four to six 60-pound bags of concrete.
Dump two sacks in the wheelbarrow, add a little water and mix using the hoe. The goal is to create a stiff, doughlike mixture. Pour the mixture into the depression, mounding it up to a height of about 4 inches. Use the trowel to round off the edges at a 45-degree angle. Then take the trowel and run it back and forth along the top to level the surface.
Finish with a sweep from a stiff broom or the edge of a serrated trowel.
You can create patterns or color the concrete during the mixing by adding lamp black, available at hardware stores, or a color, available at concrete suppliers. The concrete takes about 24 hours to set, and it’s best not to put too much weight on it for about four days, he said. If it starts to rain, cover it with a plastic tarp.