Have an interest in craft chocolate? Join the revolution
Published 1:30 am Tuesday, November 28, 2017
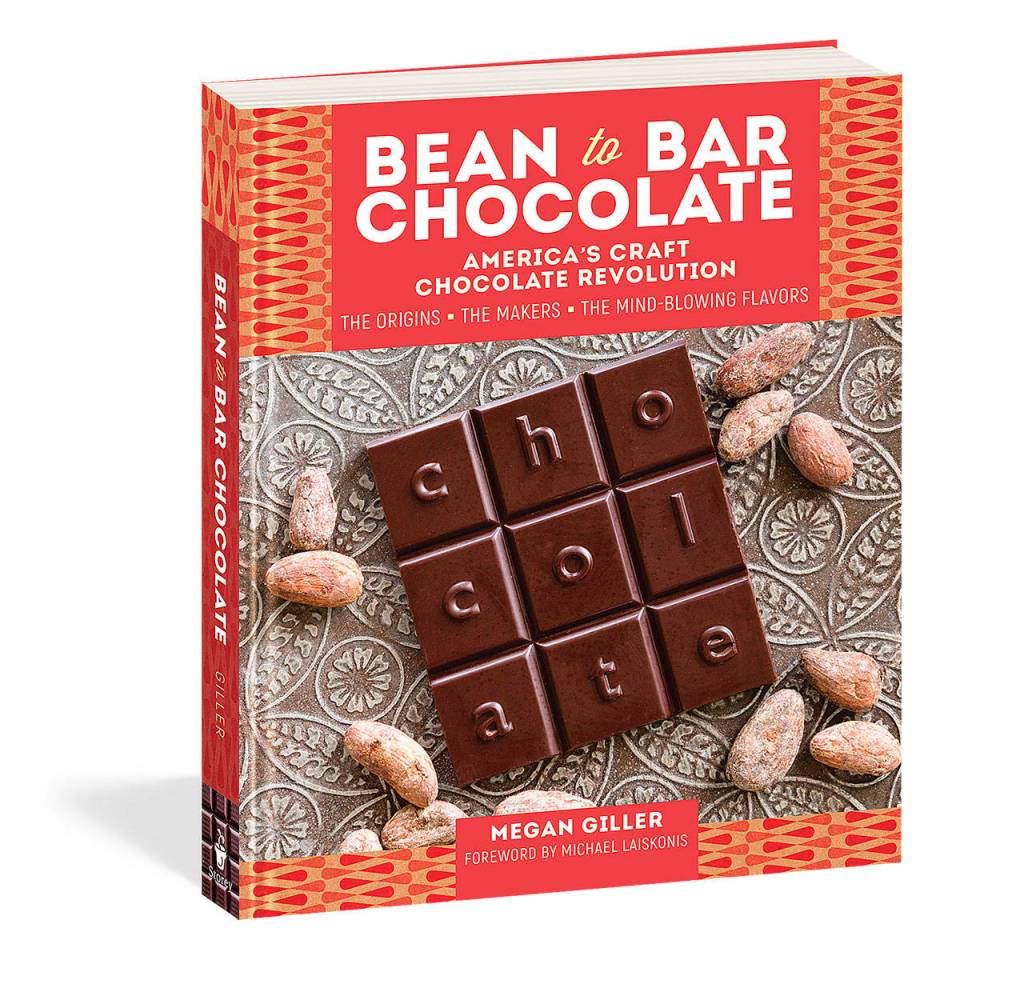


Megan Giller’s “Bean to Bar: America’s Craft Chocolate Revolution” presents the basics on chocolate and introduces key bean-to-bar producers in America’s recent craft chocolate boom.
Bean-to-bar chocolate companies source their own beans, roast them and transform them into the chocolate we love. Giller also covers chocolate farming, fair trade practices, international chocolate makers, where to buy your chocolate, chocolate characteristics based on origin, chocolate bar design, and debunks several chocolate myths. Yes, white chocolate is chocolate. No, milk chocolate is not just a beginner’s level introductory bar.
Giller includes several recipes from chocolate makers and pastry chefs designed to highlight chocolate’s unique qualities, and in the case of Pop Rocks chocolate bark, to have fun with the tasting process. A thorough and approachable book, Giller opens the door for those with any level of interest in craft chocolate.
Water-based drinking chocolate
My first experience with true drinking chocolate, not to be confused with creamy hot chocolate for dunking marshmallows, was at Portland’s Cacao chocolate shop. This recipe from Aubrey Lindley of Cacao is simple; any complexity is provided by the chocolate itself. The higher the quality of the chocolate, the better the drink. Bean-to-bar maker Theo Chocolate is Seattle-based and easy to find in almost any grocery store.
1½ cups water
8½ ounces dark chocolate (68 to 75 percent cocoa), chopped
Bring the water to a boil in a small pan. Remove from the heat and add the chocolate. Cover and let sit for 30 to 45 seconds.
Whisk gently and scrape the bottom of the pan with a rubber spatula to make sure the chocolate isn’t stuck to it. Put the pan back on the burner (keep it turned off) and let rest until the chocolate is completely melted, 2 to 3 minutes.
Whisk vigorously for a minute or 2 to emulsify completely. Check the consistency by seeing if it sticks to the back of a clean spoon. If it is lumpy, keep mixing. If it sticks and is smooth, you are finished. Don’t confuse bubbles for clumps; small air bubbles are OK! Some bits of chocolate will stubbornly remain at the bottom of the pan, but don’t worry about them.
Serve warm. The flavors and texture will evolve as it gradually cools and rests. Makes 2 servings.
Olive oil-sourdough truffles
This recipe from Fruition Chocolate is a bit more advanced, and requires tempering your chocolate, which can often be a finicky process. She recommends making these with Dominican Republic chocolate, or any fruity chocolate — craft bars typically list their characteristics on the packaging. Use the best extra-virgin olive oil and bread you can find. Giller recommends Spanish olive oil and locally baked bread if possible.
For the ganache:
8¾ ounces dark chocolate (70 percent cocoa), chopped
¾ cup plus 5 teaspoons extra-virgin olive oil
To coat the truffles:
About 6 slices sourdough bread
1 pound dark chocolate (70 percent cocoa)
Note: You will need a pastry bag for this recipe.
For the ganache, temper the chocolate. Microwave ⅔ the chocolate for 30 seconds to 1 minute, then microwave in 10 to 15 second intervals until the chocolate is almost completely melted. Finish with 5 second intervals to make sure you don’t burn the chocolate. Add the remaining ⅓ chocolate to the melted chocolate and stir with spatula until melted and shiny. Use a digital thermometer to tell when the chocolate cools to 90 degrees and is ready for use.
Stir the oil into the tempered chocolate and blend well (preferably with an immersion blender, but by hand will work too). The ganache will be very liquidy. Place in the refrigerator and let chill for 2 to 4 hours, until it’s firm but not solid.
Line a baking sheet with parchment paper. Transfer the ganache to a pastry bag and pipe into quarter-size balls on the baking sheet. As you pipe, keep the bag about 1⁄4 inch above the paper so it doesn’t touch or stick to the paper. Cover the balls with plastic wrap and place in refrigerator until firm, 1 to 2 hours.
Using your hands, roll each rough ball into a more-rounded ball. Some people like to wear gloves here, because this step is kind of sticky and messy. (Sorry, not sorry.) Place in the freezer overnight to harden.
The next day, when you’re ready to finish the truffles, preheat the oven to 325 degrees. Cut the sourdough into 1-inch chunks and place on a baking sheet. Toast in the oven until dry, about 20 to 30 minutes. Let cool.
Cover a baking sheet with parchment paper. Pulse the toasted bread in a food processor until you have small crumbs, then pour the crumbs onto the lined baking sheet, spreading them out evenly.
Temper the chocolate for the coating. Line a second baking sheet with parchment paper.
Take the truffles out of the freezer and drop them, one at a time, into the warm tempered chocolate. Using a fork to guide it, roll the ball over once so that it’s completely coated in the melted chocolate. Balance it on the fork, bouncing or shaking it lightly to remove any extra chocolate, then wipe the bottom of the fork against the edge of the bowl to remove any remaining extra chocolate.
Roll the ball in the bread crumbs to coat. Transfer to the lined baking sheet.
Let the truffles sit at room temperature until the chocolate coating is set, which should take 5 minutes or less. Makes 30 truffles.
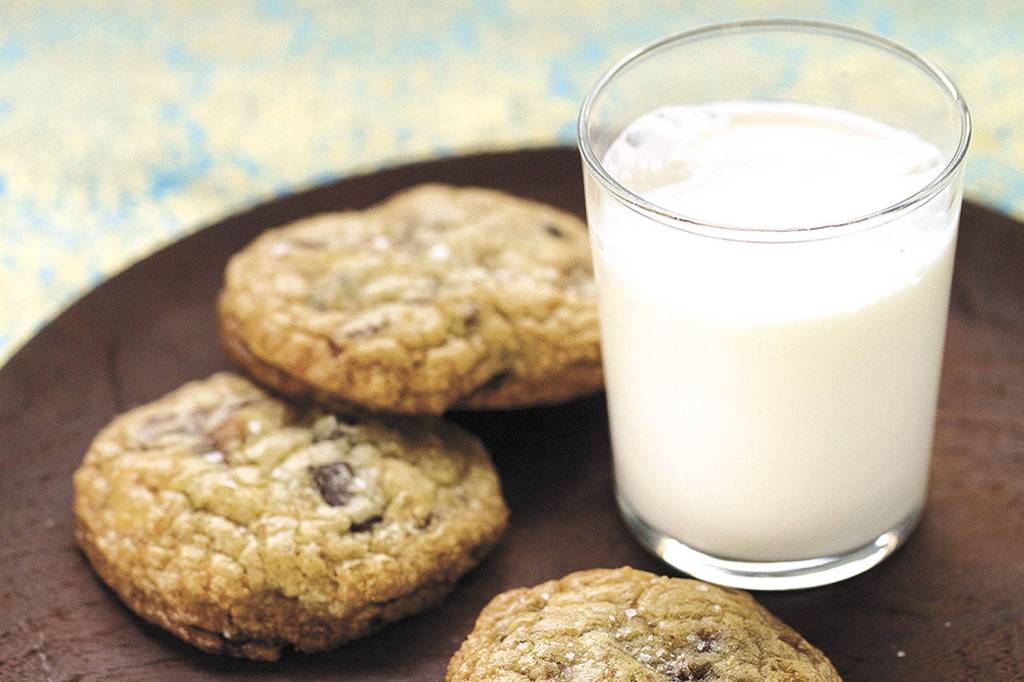
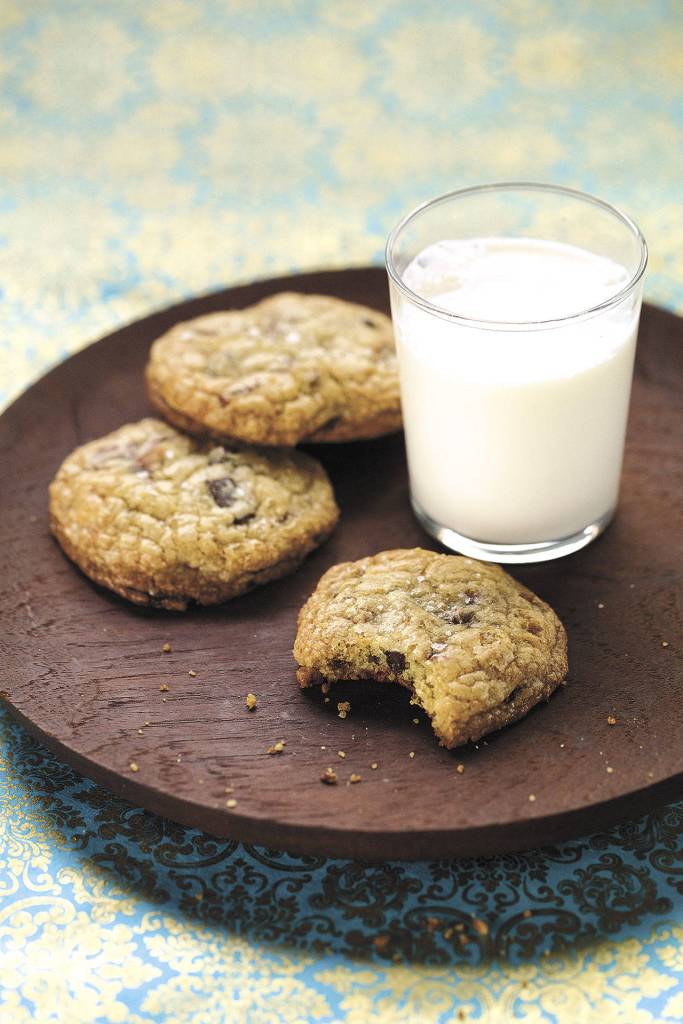
Triple chocolate chunk cookies
This recipe is from Miro Uskokovic, pastry chef at Gramercy Tavern and Untitled at the Whitney Museum. Uskokovic actually prefers to make these gluten free, using Thomas Keller’s Cup4Cup flour. The recipe below uses wheat flour, but you can buy Cup4Cup at most grocery stores or online, should you prefer to make these gluten free.
1½ cups (3 sticks) unsalted butter, at room temperature
1½ cups light brown sugar
1 cup plus 2 tablespoons granulated sugar
1 tablespoon vanilla extract
1 teaspoon kosher salt
3 eggs
2 egg yolks
4 cups all-purpose flour
1 teaspoon baking soda
2¼ cups dark chocolate chunks (72 percent cocoa)
1½ cups milk chocolate chunks
1 cup white chocolate chunks
Sea salt, for garnish
Note: You’ll need a stand mixer (though you can easily substitute a hand mixer if that’s all you have).
In a stand mixer fitted with the whisk attachment, combine the butter, brown sugar, granulated sugar, vanilla and kosher salt. Mix at low speed for 30 seconds.
Add the eggs and egg yolks and mix at medium speed until the mixture resembles thick frosting, 5 to 8 minutes. You should see the contents double in size and get lighter and fluffier.
In a second bowl, sift together the flour and baking soda.
Switch the mixer attachment from whisk to paddle. Add the flour and baking soda and mix until just barely incorporated.
Add the chocolate chunks and mix to combine at slow speed or by hand.
Transfer the dough to an airtight container and put it in the fridge to rest overnight. If you’re short on time, you can pull it out of the fridge after 2 to 4 hours.
Remove the dough from the fridge and let it come to room temperature. Preheat the oven to 375 degrees.
Using an ice cream scoop, scoop evenly sized balls of dough (roughly 2 tablespoons each) onto an ungreased baking sheet, making sure to leave a few inches of room around each. Sprinkle each cookie with a pinch of sea salt. Bake for 8 to 9 minutes, or until the edges are golden brown and the cookie is still soft inside. Let cool (almost) completely.
Eat while slightly warm, with a glass of cold whole milk. Makes about 4 dozen large cookies.
Reprinted with permission from “Bean-to-Bar Chocolate” by Megan Giller. Published by Storey Publishing. Photography by Jody Horton.